Is your pool looking a little cloudy lately? It might be time to give your above ground pool filter some TLC. Keeping your pool filter clean isn’t just about aesthetics; it’s essential for maintaining a healthy swimming environment. In this guide, we’ll dive into the step-by-step process of cleaning different types of pool filters—whether you’re dealing with sand, cartridge, or diatomaceous earth (D.E.) filters. By the end of this article, you’ll have all the know-how to keep your pool water crystal clear and inviting, no matter the season!
Ready to upgrade your pool? Click the link to discover the best above ground pool options on the market! Find the perfect pool now!
Understanding the Importance of Regular Filter Cleaning
Contents
You might be thinking, “Do I really need to clean my pool filter that often?” The short answer: absolutely. Regular filter cleaning is one of those things that can make or break your pool experience, especially if you want to keep that water sparkling clear and safe for swimming.
Why Regular Cleaning Prevents Algae Growth and Cloudy Water
Imagine this: it’s a hot summer day, and you’re ready to dive into your pool, only to find it looking murky and uninviting. Yikes! This is often a sign that your filter isn’t doing its job. When a pool filter is clogged or dirty, it can’t effectively remove debris, dirt, and contaminants from the water. This buildup can create the perfect environment for algae to thrive. Algae spores are always lurking in the background, waiting for an opportunity to take over, and a dirty filter gives them just that chance.
Regular cleaning keeps the filter media (whether it’s sand, cartridge, or D.E.) free from the debris that encourages algae growth. By keeping the filter clean, you’re essentially cutting off the algae’s food supply, which is crucial for keeping your pool water crystal clear. Plus, nobody wants to swim in a pool that looks like a science experiment!
How a Clean Filter Improves Circulation and Filtration Efficiency
Another reason to stay on top of your filter cleaning is to ensure your pool’s circulation system runs smoothly. When the filter is clogged, the pump has to work much harder to push water through, leading to poor circulation. Poor circulation isn’t just bad for water clarity; it can also cause uneven distribution of chemicals, which can lead to areas of the pool becoming chemically imbalanced. This imbalance can make your pool uncomfortable to swim in and can even damage your pool surfaces over time.
A clean filter allows water to flow freely, ensuring that your filtration system is working at its best. Proper circulation means that every drop of water in your pool is being filtered effectively, which not only keeps the water clean but also helps in distributing heat more evenly if you’re using a pool heater. So, by keeping that filter clean, you’re not just protecting your water quality—you’re also making sure your entire pool system works efficiently.
The Role of Filter Cleaning in Extending the Life of Your Pool Equipment
Let’s talk about money for a minute. Pool equipment isn’t cheap, and you definitely want to get the most out of your investment. Regular filter cleaning plays a huge role in extending the life of your pool pump and other equipment. When a filter is dirty, the pump has to work harder, which can lead to overheating and, eventually, failure. Replacing a pump can be a costly affair, not to mention the inconvenience of having your pool out of commission during the repair process.
But it’s not just the pump that benefits from regular filter cleaning. Your filter itself will last longer if it’s properly maintained. For instance, sand filters can last 5-7 years, but if you neglect cleaning, that lifespan can be significantly shortened. Cartridge filters can last 3-5 years with proper care, but again, neglect can mean you’ll be replacing them much sooner than necessary.
In short, keeping your filter clean is an investment in the longevity of your entire pool system. It’s a simple task that can save you a lot of hassle and money in the long run, not to mention keeping your pool in top condition for whenever you’re ready to take a dip.
So, next time you’re tempted to skip a filter cleaning, remember that it’s about more than just aesthetics. Regular maintenance is key to preventing algae growth, ensuring efficient circulation, and extending the life of your pool equipment. Your future self (and your wallet) will thank you!
General Steps for Cleaning Any Pool Filter

When it comes to keeping your pool filter in tip-top shape, following a regular cleaning routine is essential. While the specifics can vary depending on whether you have a sand, cartridge, or D.E. filter, the general steps to clean any pool filter remain consistent. Here’s how to get started on maintaining a filter that keeps your pool water pristine.
Run the Pump and Check the Pressure Gauge
The first step in any pool filter cleaning routine is to run the pump. This may seem like a no-brainer, but it’s crucial for getting an accurate read on your filter’s condition. With the pump running, take a look at the pressure gauge on your filter. The pressure gauge is your best friend when it comes to knowing when your filter needs attention.
Typically, you’ll want to take note of the “normal” operating pressure of your filter when it’s clean. This is the baseline you’ll compare to over time. If you notice that the pressure gauge reads 8-10 PSI (pounds per square inch) higher than your normal baseline, it’s a sign that your filter is struggling to push water through, which means it’s time for a cleaning.
Understand When It’s Time to Backwash or Clean the Filter
So, you’ve noticed the pressure gauge creeping up—now what? Depending on the type of filter you have, you’ll either need to backwash or clean the filter elements directly.
- Sand Filters: When the pressure is up, it’s time to backwash. Backwashing reverses the flow of water through the filter, flushing out the trapped debris that’s causing the pressure increase. After backwashing, it’s also a good idea to set the filter to ‘Rinse’ mode for a minute or two to resettle the sand and clear out any remaining debris.
- D.E. Filters: Similar to sand filters, D.E. filters also require backwashing when the pressure rises. After backwashing, you’ll need to recharge the filter by adding fresh D.E. powder through the skimmer. This helps restore the filter’s efficiency and keeps your water sparkling clean.
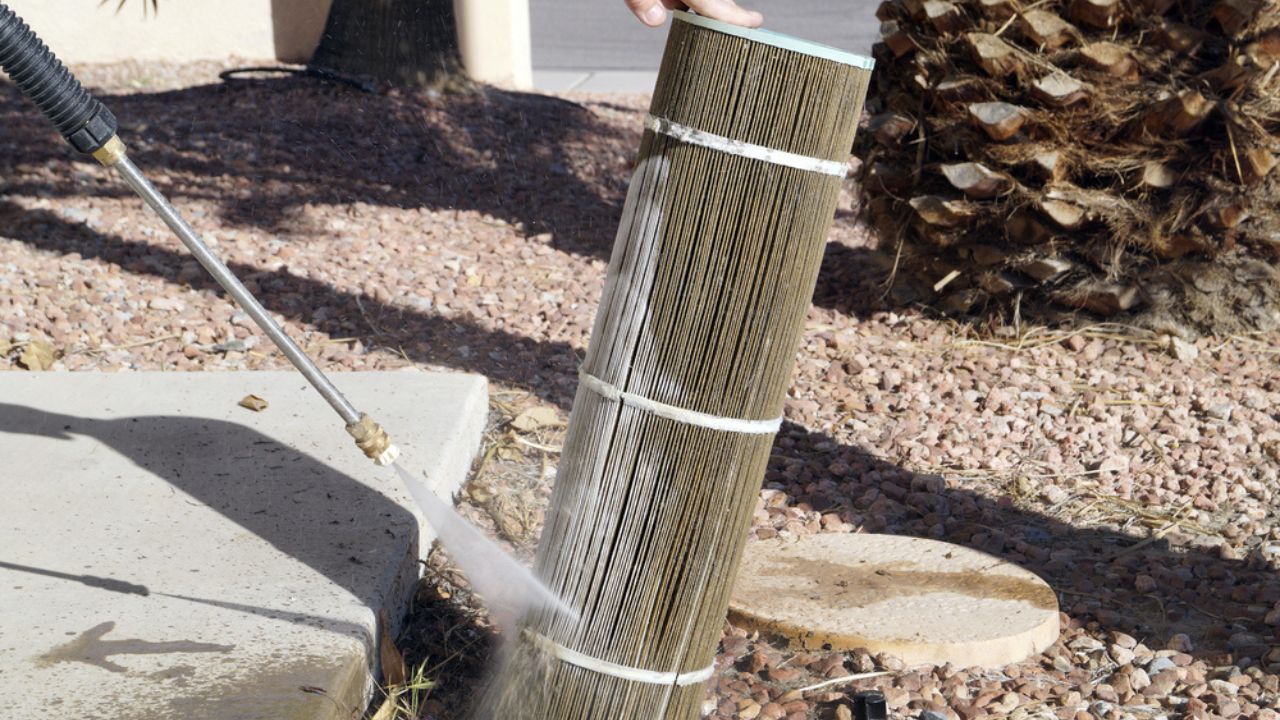
- Cartridge Filters: For cartridge filters, the process involves removing the filter cartridge and giving it a good rinse with a garden hose. Pay special attention to spray between the pleats to remove trapped dirt and debris. If the cartridge is particularly dirty, soaking it in a specialized cleaning solution for a few hours can help break down oils and other stubborn contaminants.
Basic Tools and Supplies You’ll Need
Before you get started, make sure you have all the necessary tools and supplies on hand. Here’s a quick checklist to ensure you’re prepared:
- Pressure Gauge: Double-check that your pressure gauge is working properly and giving accurate readings.
- Backwash Hose: If you have a sand or D.E. filter, you’ll need a backwash hose to redirect the dirty water away from your pool area.
- Garden Hose: A good, strong garden hose is essential for rinsing cartridge filters and cleaning off any debris.
- Filter Cleaning Solution: For cartridge filters, a specialized cleaning solution can help dissolve oils and scale buildup that simple rinsing can’t tackle.
- D.E. Powder: If you have a D.E. filter, make sure you have fresh D.E. powder on hand for recharging the filter after backwashing.
- Replacement Parts: It’s always a good idea to keep spare O-rings, gaskets, and other small parts on hand, as these can wear out over time and cause leaks or inefficiency in your filter system.
With these tools and a solid understanding of when and how to clean your pool filter, you’ll be well on your way to maintaining a clear, healthy swimming environment. Regular filter maintenance might take a bit of effort, but it’s one of the most important aspects of pool care that you can’t afford to skip.
How to Clean a Sand Pool Filter
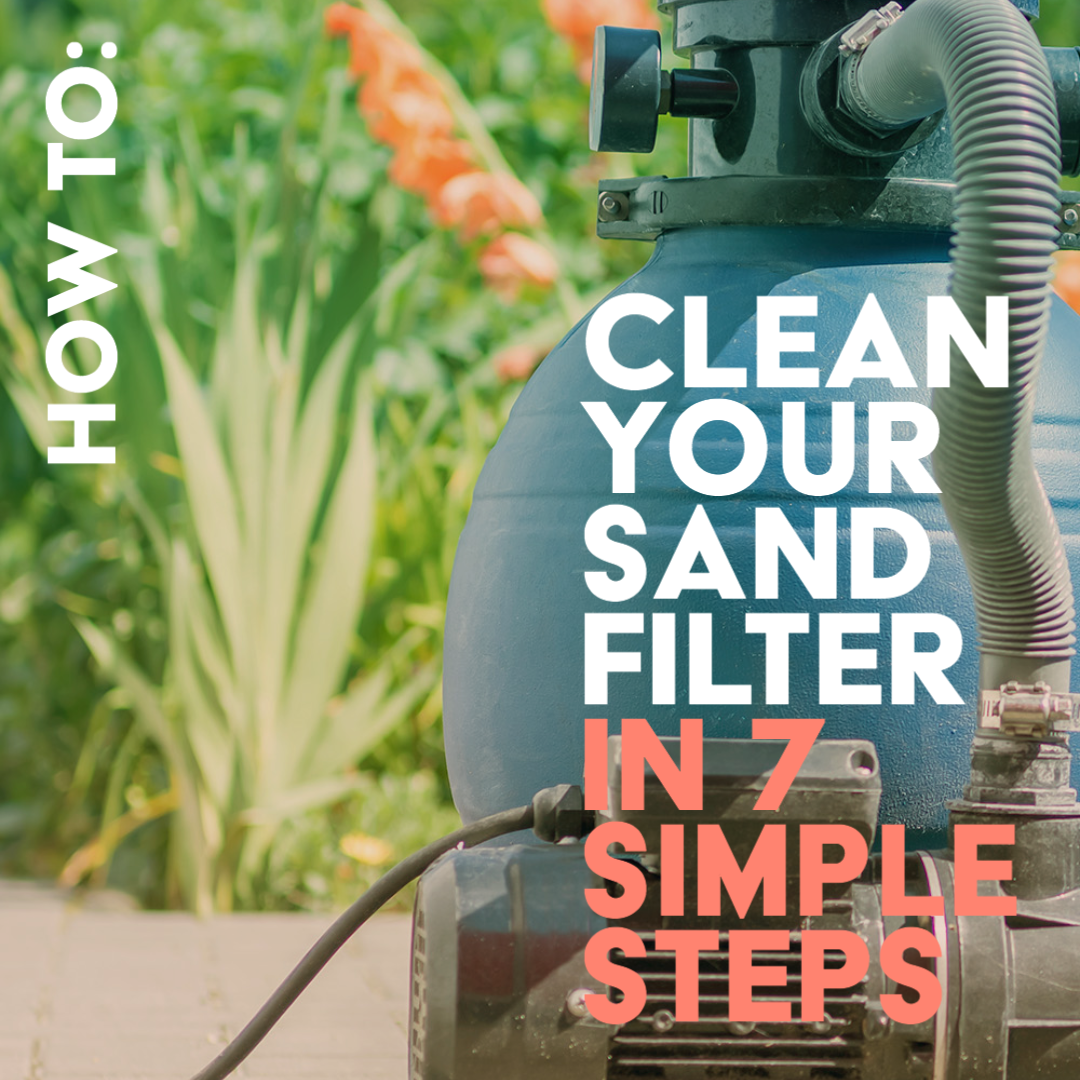
Cleaning a sand pool filter is a straightforward process, but it’s crucial to do it correctly to ensure your pool stays clean and the filter operates efficiently. Sand filters work by trapping dirt and debris in a bed of sand, but over time, this can cause the filter to become clogged, leading to poor water circulation and filtration. Here’s how to clean your sand filter properly, along with tips for troubleshooting common issues.
Steps to Backwash a Sand Filter
Backwashing is the primary method for cleaning a sand filter. It’s a simple process that involves reversing the flow of water through the filter to flush out trapped debris. Here’s how to do it:
- Turn Off the Pump: Before you start, make sure the pool pump is turned off. This prevents damage to your pool’s filtration system during the backwashing process.
- Set the Valve to ‘Backwash’: Locate the multiport valve on your sand filter and turn it to the ‘Backwash’ setting. This will reverse the flow of water, pushing debris out of the filter.
- Turn the Pump Back On: Once the valve is set to ‘Backwash,’ turn the pump back on. You’ll notice water flowing out of the backwash hose, which is usually directed to a drain or a designated area away from the pool. Let the pump run for about 2-3 minutes or until the water in the sight glass (a small window on the filter) runs clear.
- Turn Off the Pump Again: After the water runs clear, turn the pump off. This prevents any unfiltered water from entering your pool.
- Set the Valve to ‘Rinse’: Now, turn the valve to the ‘Rinse’ setting. This step is crucial as it helps to resettle the sand bed in the filter and removes any remaining debris that might have been left behind after backwashing.
- Rinse the Filter: Turn the pump back on and let it run for 1-2 minutes while in ‘Rinse’ mode. This ensures that any dirty water left in the system is flushed out, preventing it from returning to the pool.
- Return to ‘Filter’ Mode: Finally, turn the pump off again, set the valve back to the ‘Filter’ position, and turn the pump on. Your filter is now clean and ready to continue filtering your pool water effectively.
Setting the Filter to ‘Rinse’ Mode and Why It’s Important
You might be wondering why the ‘Rinse’ mode is so important after backwashing. When you backwash a sand filter, the sand bed inside the filter gets stirred up, and debris that’s been trapped might not be fully flushed out. If you skip the ‘Rinse’ step, some of this debris could be returned to the pool when you switch back to ‘Filter’ mode, negating the cleaning you just did.
The ‘Rinse’ mode directs the water flow downward through the sand bed, helping to resettle the sand into an even layer and flushing out any remaining debris that was loosened during backwashing. This step ensures that the next time your filter cycles water, it’s doing so with a properly arranged sand bed, optimizing filtration efficiency and keeping your pool water clear.
Troubleshooting Common Issues with Sand Filters
Even with regular cleaning, sand filters can run into a few common issues. Here’s how to troubleshoot them:
- Cloudy Pool Water: If your pool water remains cloudy after backwashing and rinsing, it might indicate that the sand in your filter is too old or clogged with oils and debris. In this case, it may be time to replace the sand. Generally, sand needs replacing every 5-7 years.
- Poor Water Circulation: If you notice weak water flow from your return jets, even after cleaning the filter, check for any obstructions in the pump basket or skimmer. Additionally, the multiport valve might be faulty or there could be an issue with the pool pump itself.
- Sand in the Pool: Finding sand at the bottom of your pool could indicate a broken lateral inside the filter. The laterals are responsible for keeping the sand inside the filter while allowing water to pass through. If they’re cracked or damaged, they’ll need to be replaced to prevent sand from leaking into your pool.
- High Pressure Gauge Reading: If the pressure gauge shows a high reading even after backwashing, it could mean that the filter is too dirty to be cleaned by backwashing alone. In such cases, a deep clean using a filter cleaner designed for sand filters might be necessary.
By following these steps and troubleshooting tips, you can keep your sand pool filter working efficiently, ensuring your pool stays clean and clear throughout the swimming season. Regular maintenance not only improves water quality but also extends the lifespan of your filter, saving you time and money in the long run.
How to Clean a Cartridge Pool Filter

Cartridge pool filters are known for their efficiency and ease of maintenance, but like all filters, they need regular cleaning to perform at their best. Unlike sand or D.E. filters, cartridge filters don’t require backwashing. Instead, the filter elements—cartridges—are removed and cleaned manually. Here’s how to properly clean your cartridge pool filter, keep it functioning optimally, and know when it’s time for a replacement.
Removing the Cartridge and Rinsing It with a Garden Hose
The first step in cleaning your cartridge pool filter is to remove the cartridges from the filter housing. Here’s how to do it:
- Turn Off the Pump: Always start by turning off your pool pump and any automated systems connected to your filtration setup. This prevents water from flowing while you’re working on the filter.
- Release the Pressure: Before opening the filter, you need to release the built-up pressure inside the filter tank. Most filters have a pressure relief valve on top; simply open this valve until you hear the pressure hissing out.
- Open the Filter Housing: Depending on your filter model, you may need to remove a clamp or undo screws to open the filter housing. Once open, you’ll see the cartridge(s) inside.
- Remove the Cartridge: Carefully remove the cartridge from the filter housing. Take note of how it’s positioned so you can easily replace it after cleaning.
- Rinse the Cartridge with a Garden Hose: Using a garden hose, rinse the cartridge thoroughly. Hold the hose at a 45-degree angle and spray between the pleats, starting from the top and working your way down. This helps to dislodge dirt, debris, and oils trapped in the pleats. It’s important to be thorough but gentle—too much pressure can damage the cartridge fabric.
Rinsing should be your go-to method for regular cleaning, but if your cartridge is heavily soiled or hasn’t been cleaned in a while, a deeper clean might be necessary.
Using a Specialized Cleaning Solution for Deep Cleaning
Over time, oils, sunscreen, and other fine particles can build up on the cartridge, making it harder to clean with just a hose. That’s where a specialized cleaning solution comes in:
- Prepare the Cleaning Solution: There are various filter cleaning solutions available, typically designed to break down oils and minerals that cling to the cartridge fabric. Follow the manufacturer’s instructions to mix the cleaning solution in a large bucket or container.
- Soak the Cartridge: Place the cartridge in the cleaning solution and let it soak. Most products recommend soaking for at least a few hours, but overnight is even better if the cartridge is heavily soiled.
- Rinse Thoroughly: After soaking, remove the cartridge and rinse it again thoroughly with the garden hose. Ensure all cleaning solution is rinsed out, as any residue left on the cartridge can foam up or affect water chemistry when placed back in the filter.
- Allow to Dry (Optional): While not always necessary, allowing the cartridge to air dry after rinsing can help the pleats regain their shape and make it easier to see if any debris remains. However, you can also place the cartridge back into the filter while it’s still wet if you need to get your pool up and running quickly.
How to Tell When Your Cartridge Needs Replacing
No cartridge lasts forever, so it’s important to know when it’s time to replace yours. Here are the signs to look out for:
- Visible Wear and Tear: Over time, the fabric on the cartridge can begin to fray, tear, or develop holes. If you notice any of these issues, it’s time to replace the cartridge immediately, as it won’t be able to filter your pool water effectively.
- Increased Pressure Readings: If you notice that the pressure gauge on your filter rises quickly after cleaning or the pump struggles to maintain water flow, it could be a sign that the cartridge is becoming clogged beyond cleaning. This happens as the pleats become packed with debris that can’t be washed out, or the fabric becomes too worn to perform properly.
- Flattened or Compressed Pleats: The pleats in a cartridge are designed to maximize the surface area for filtering water. If these pleats start to look flattened or compressed, it means they’re no longer effective at capturing debris, and the cartridge needs to be replaced.
- Age of the Cartridge: As a general rule, cartridge filters last between 3-5 years, depending on usage, maintenance, and water conditions. If your cartridge is approaching this age range, it’s a good idea to start planning for a replacement, even if it’s still performing adequately.
By staying on top of regular cleaning and knowing when to replace your cartridge, you’ll ensure that your pool stays clean and clear, with a filtration system that’s running smoothly. Remember, a well-maintained cartridge filter is key to enjoying a trouble-free pool season.
How to Clean a Diatomaceous Earth (D.E.) Pool Filter

Diatomaceous Earth (D.E.) filters are known for their superior filtration capabilities, capable of trapping even the smallest particles and leaving your pool water crystal clear. However, maintaining a D.E. filter requires regular cleaning and a bit more attention compared to other types of filters. Here’s how to properly clean a D.E. pool filter, inspect it for damage, and handle the D.E. powder safely.
Backwashing and Recharging the D.E. Filter with Fresh Powder
Backwashing is the primary method for cleaning a D.E. filter, similar to how you would clean a sand filter. However, there’s an additional step required for D.E. filters: recharging the filter with fresh D.E. powder after each backwash. Here’s how to do it:
- Turn Off the Pump: Always start by turning off the pool pump. This prevents water from flowing through the filter while you’re performing maintenance.
- Set the Valve to ‘Backwash’: Locate the multiport valve on your filter and set it to the ‘Backwash’ position. This reverses the flow of water through the filter, flushing out the trapped dirt and used D.E. powder.
- Turn the Pump On and Backwash: Turn the pump back on and let it run in backwash mode for 2-3 minutes. You’ll see dirty water being expelled through the waste line. Continue backwashing until the water in the sight glass runs clear.
- Turn Off the Pump Again: After backwashing, turn the pump off to prevent unfiltered water from entering your pool.
- Set the Valve to ‘Rinse’: Just like with a sand filter, you’ll want to rinse the filter after backwashing. Set the valve to ‘Rinse’ and turn the pump back on for 1-2 minutes. This step helps clear out any remaining dirty water and resettles the grids inside the filter.
- Return to ‘Filter’ Mode and Recharge with D.E. Powder: Turn the pump off, set the valve back to ‘Filter,’ and then turn the pump back on. Now it’s time to recharge the filter with fresh D.E. powder. Measure the correct amount of D.E. powder as recommended by your filter’s manufacturer (typically, it’s around 1 pound of D.E. powder per 10 square feet of filter area). Slowly add the D.E. powder into the skimmer while the pump is running, allowing it to be evenly distributed onto the filter grids.
- Monitor the Pressure Gauge: After recharging the filter, keep an eye on the pressure gauge. If the pressure rises quickly, it could indicate an issue, such as an improper recharge or a problem with the filter grids.
Inspecting the Filter Grids for Damage
While cleaning your D.E. filter, it’s a good idea to inspect the filter grids for any signs of wear and tear. The grids are responsible for holding the D.E. powder, which does the actual filtering of the water, so they need to be in good condition to work effectively. Here’s what to look for:
- Tears or Holes in the Fabric: Inspect each grid carefully for any tears, holes, or other damage. Even small rips can allow debris to bypass the filter and end up back in your pool. If you find any damage, the affected grid should be replaced immediately.
- Loose Seams or Stitching: Over time, the seams or stitching on the grids can begin to loosen or unravel. This can affect the grid’s ability to hold the D.E. powder properly, reducing the filter’s efficiency. If you notice any loose stitching, consider replacing the grid.
- Build-Up of D.E. Powder: If D.E. powder appears caked onto the grids, it might indicate that the grids are not being cleaned thoroughly during backwashing. In such cases, you may need to remove the grids and hose them down individually or use a specialized filter cleaner.
- Cracks in the Grid Frame: The plastic frame of each grid should be intact. If you notice any cracks or breaks, the grid could collapse under the pressure of the water, leading to improper filtration.
Tips for Safely Handling D.E. Powder
Diatomaceous Earth powder is highly effective for pool filtration, but it’s also a fine, powdery substance that needs to be handled with care. Here are some tips to ensure you handle D.E. powder safely:
- Wear Protective Gear: When working with D.E. powder, always wear a mask to avoid inhaling the fine particles, which can be harmful to your lungs. Gloves are also recommended to prevent skin irritation.
- Avoid Spills: D.E. powder can be messy, so handle it with care to avoid spills around your pool area. If you do spill any powder, clean it up immediately to prevent it from becoming airborne or getting into the pool water unintentionally.
- Store Properly: Store your D.E. powder in a cool, dry place, and keep it tightly sealed in its original container. This helps prevent moisture from clumping the powder and keeps it safe from contamination.
- Dispose of Used D.E. Responsibly: After backwashing, the used D.E. powder is expelled along with the dirty water. Ensure that your backwash hose is directed to an appropriate disposal area where the powder won’t cause environmental harm. Never dispose of D.E. powder directly into storm drains or natural water bodies.
By following these steps and handling D.E. powder with care, you’ll keep your D.E. filter in top condition, ensuring it continues to deliver the exceptional water clarity you expect. Regular maintenance not only keeps your pool looking great but also extends the lifespan of your filter system, making your pool season as enjoyable as possible.
Maintenance Tips for a Long-Lasting Pool Filter
Proper maintenance of your pool filter is key to ensuring its longevity and keeping your pool water clean and clear. While cleaning your filter regularly is essential, understanding the specific needs of different types of filters, knowing when a filter needs to be replaced, and following seasonal maintenance tips can significantly extend the life of your pool equipment. Here’s how to keep your filter in top shape all year round.
How Often to Clean Each Type of Filter
The frequency with which you need to clean your pool filter depends on the type of filter you have and the conditions surrounding your pool. Here’s a general guideline for each type of filter:
- Sand Filters: Sand filters typically need to be backwashed every 1-2 weeks, depending on how often your pool is used and how much debris enters the water. If you notice the pressure gauge reading 8-10 PSI above the normal operating pressure, it’s time to backwash the filter. Additionally, the sand within the filter should be replaced every 5-7 years to maintain optimal filtration efficiency.
- Cartridge Filters: Cartridge filters require more frequent cleaning, usually every 2-4 weeks. You’ll know it’s time to clean when the pressure gauge rises about 10 PSI above normal or when the water flow from the return jets decreases noticeably. While the cartridges can be rinsed regularly, they should be soaked in a specialized cleaning solution a few times per season for a deeper clean. Cartridge filters typically need replacing every 3-5 years, depending on their condition.
- Diatomaceous Earth (D.E.) Filters: D.E. filters should be backwashed every 1-2 months, or when the pressure gauge reads 8-10 PSI above normal. After each backwash, it’s essential to recharge the filter with fresh D.E. powder. The filter grids themselves should be inspected and cleaned thoroughly at least once per season. The grids generally last 5-10 years, but they should be replaced if they show signs of damage.
Recognizing Signs That Your Filter Needs Replacement
No matter how well you maintain your pool filter, there will come a time when it needs to be replaced. Here are some signs that indicate it’s time for a new filter:
- Consistently High Pressure Readings: If your filter’s pressure gauge remains high even after cleaning, it may indicate that the filter media (sand, cartridge, or D.E. grids) is too clogged or worn out to be effective. When cleaning no longer reduces the pressure, it’s time to consider replacing the filter or its components.
- Visible Wear and Tear: For cartridge and D.E. filters, inspect the filter media for visible signs of damage such as tears, fraying, or holes. Sand filters, on the other hand, may show signs of needing replacement when the sand becomes too compacted or develops channels that allow water to pass through without being filtered properly.
- Decreased Water Flow: If you notice a significant reduction in water flow through the return jets, even after cleaning the filter, it’s a sign that the filter media may be too old or damaged to function correctly. This can lead to poor filtration and cloudy pool water, necessitating a replacement.
- Poor Water Quality: If your pool water remains cloudy, has persistent algae issues, or seems difficult to balance chemically despite regular maintenance, it may indicate that your filter is no longer doing its job effectively. In such cases, replacing the filter media or the entire filter unit might be necessary to restore water quality.
Seasonal Maintenance Tips to Keep Your Pool Ready Year-Round
To ensure your pool filter remains in good working condition throughout the year, it’s important to adjust your maintenance routine according to the seasons. Here are some tips to follow:
- Spring: As you prepare to open your pool for the season, give your filter a thorough cleaning. For sand and D.E. filters, this might include replacing the sand or inspecting and cleaning the grids. For cartridge filters, this is a good time to deep clean or replace the cartridges if necessary. Also, check all seals, O-rings, and other components for wear and replace them if needed.
- Summer: During the peak swimming season, your filter will be working overtime. Clean the filter regularly—every 1-2 weeks for sand filters, every 2-4 weeks for cartridge filters, and every 1-2 months for D.E. filters. Monitor the pressure gauge frequently and perform any necessary maintenance to keep your pool water crystal clear.
- Fall: As swimming season winds down, prepare your pool and filter for the off-season. Give your filter a final, thorough cleaning and inspect it for any signs of damage or wear. If you’re planning to close your pool for the winter, make sure to drain the filter and store any removable parts like cartridges or D.E. grids in a dry, protected area.
- Winter: If your pool remains open during the winter, reduce your filter’s runtime since the pool will likely require less maintenance. However, it’s still important to check the filter periodically for any issues and clean it as needed. For pools that are closed, ensure that the filter system is properly winterized to prevent freeze damage.
By following these maintenance tips and keeping a close eye on your pool filter’s condition, you can extend its lifespan and enjoy clean, clear water all year long. A well-maintained filter not only saves you time and money but also ensures that your pool is always ready for a refreshing swim.
Conclusion
Cleaning your above ground pool filter might seem like a chore, but it’s a crucial part of pool maintenance that pays off with clear, sparkling water all summer long. By following the steps outlined in this guide and staying on top of regular maintenance, you’ll extend the life of your pool equipment and enjoy a healthier swimming environment. So, what are you waiting for? Grab those cleaning tools and dive into pool care like a pro!

Leave a Reply